Monthly Archives: August 2019

To heat or not to heat an orthotic?

ICB Lower limb biomechanics

Often practitioners ask if there is really any reason that they should bother heating and moulding the ICB orthotic product.

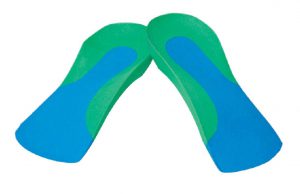
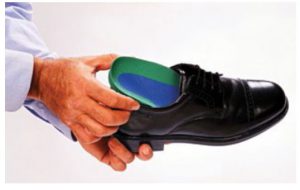
Whilst the product can be used directly out of the presentation pack and placed into the shoe, heat moulding provides an added dimension in maximising patient compliance.


View ICB Products

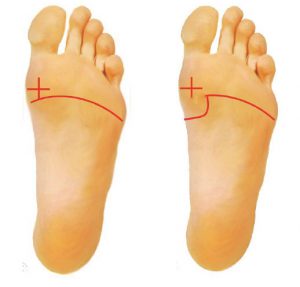
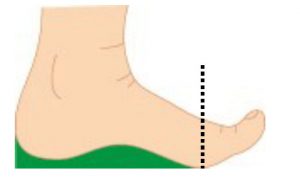
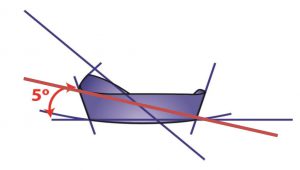
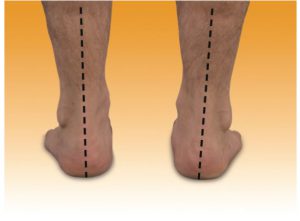
Generally we recommend that upon observation if the rearfoot position is lower than +3° or greater than +6° heat moulding will definitely benefit the patient. The ICB product exhibits a 5° rearfoot varus Intrinsic angle to assist in realignment of the calcaneus.
Orthotics Heat Moulding

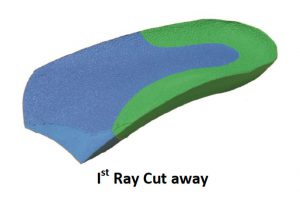
When treating rearfoot greater than 5° – 6° will be beneficial and for more pes planus foot types reducing the average 42° arch height will provide more comfort for the patient.

Measuring Orthotics

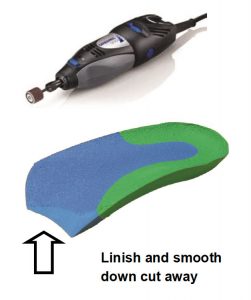
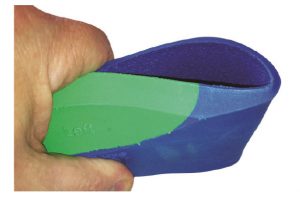
When a deflection is required to deflect around a callus etc. practitioners can use a spoon to make a deflection directly in the product.

Heating Orthotics

Often practitioners have to deal with highly unusual foot issues and the use of an adaptable heat mouldable product can be extremely helpful. Product should be chosen with the mindset that they have the capability to be modified and when the situation arises they then have the tools to perform that particular function for the patient.

Orthotics

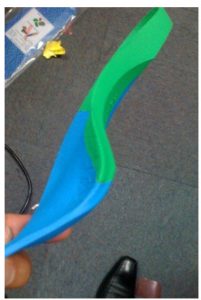
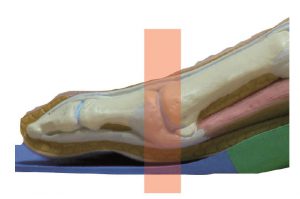
The moulding above may seem extreme , however this product was actually customised for a patient in Asia.

The patient suffered an injury and the foot was set in a particular position which created a functional right long leg.

Fitting an orthotic

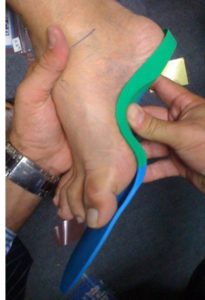
The patient refused further surgery and requested conservative treatment. This extreme moulding was combined with shoe wear that had a large heel height such as a boot to provide the desired result for the patient.

Practitioners are encouraged to experiment and use alternate methods of moulding to the patients foot shape. One such method is pictured, the foot and orthotic is wrapped in a bandage in the ideal or STJN position due to the patients inability to weight bear.

foot and orthotic is wrapped in a bandage

Difficulty can be experience when treating children and so alternate moulding methods should be experimented with in an endeavour to be able to treat the entire patient base.

Issues with treating children and heat moulding can be overcome by using a non weight bearing moulding method as seen below.

Childrens Orthotics

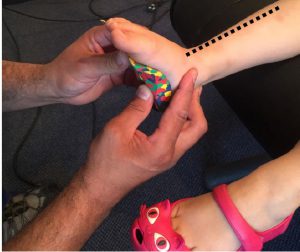
This non weight bearing method can be very effective. The use of the Anterior Alignment Method for ideal or STJN is recommended to establish positioning.

The ICB normal method of moulding is in weight bearing position, however, alternate methods can be used to treat patients whilst maintaining the patients ideal position.

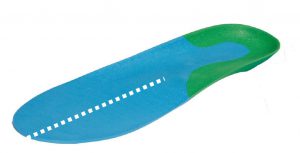
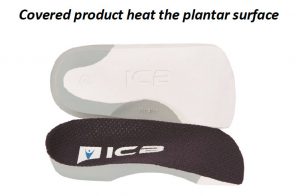
Generally product that does NOT have a material cover can be heated on the dorsal and plantar surface, whereas with covered product such as, seen below , should only be heated on the plantar surface to avoid burning the material cover.

ICB Orthotics

A recent development in the ICB product is the reduction in the heat time that is required to attain the optimum level of elasticity in the EVA material.

Close observation to the heating process is necessary to produce a well moulded product. Re-moulding is possible with the ICB Heat mouldable product, albeit with some loss of density integrity in which 5-7% softening of the molecular structure will be experienced on the re-heating of the product.

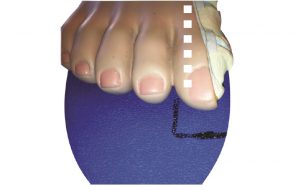
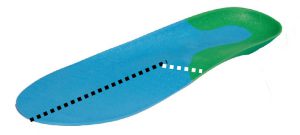
To start maintain the heat gun at a distance of approx. 10-15cm. The heating process commences by using 3 circular motions on the plantar surface located in the medial arch area concentrating on the words RIGHT & LEFT and then a further circular motion on the plantar heel area.

Heat Moulding Orthotics

Continue until the words RIGHT and LEFT tart to Melt indicating that the thermal heat level has been attained.

Orthotics in shoes

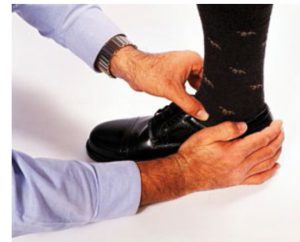
Request that the patient inserts the UN HEATED product in their shoe as this will provide foundational stability and avoid causing a functional leg length.

Next remove any factory fitted shoe innersole and place the heated product in the shoe.

Orthotics in shoes

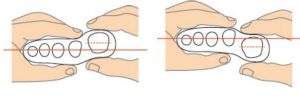
Place the foot to be moulded in the ideal or neutral position using the Anterior Alignment method and Talo Navicular method.

Maintain for 30-40 seconds. Then remove the product and allow to cool down approx. 1-2 minutes and commence the procedure again for the alternate foot.

View ICB Products


Creating a Plantarflexed 1st Deflection

ICB Lower limb biomechanics

Often the orthotic device requires some adjustment to suit the patient and assist in alleviating the pain that they may be suffering.


View ICB Products

One such deflection is a plantarflexed 1st or 1st Ray (metatarsal) cut away deflection.
ICB Orthotic

A plantarflexed 1st metatarsal phalangeal joint (MTPJ) sits plantarflexed to the lesser metatarsals and can be a fixed osseous or mobile condition which can result in the patient suffering from Sesamoiditis (inflammation or bifurcation of the sesamoid apparatus). A supinated foot position and forefoot Valgus can often accompany this condition.


Sesamoiditis

Sesamoiditis – impingement of the Sesamoid apparatusTo assess for a plantarflexed 1st place the foot in the neutral and take hold of the lesser metatarsals (2nd to 5th). Using the thumb and pointer finger to grip the 1st MTPJ and lesser metatarsals – the amount of dorsiflexion and plantarflexion should be 5mm up and 5mm down from the axis of the lesser metatarsals.

Plantarflexed Assesment

Plantarflexed 1st assessment

The image (above) indicates a mobile plantarflexed 1st, having limited dorsiflexion with significant plantarflexion.

If the joint will not move then it is a fixed Plantarflexed 1st, meaning that there is no dorsiflexion or it is minimal, and that it sits in a fixed plantarflexed position.

Treatment for a Fixed Plantarflexed 1st will be a ‘1st ray cut away’ deflection created in the orthotic which will provide 1st metatarsal relief and support to the lesser metatarsals.

Plantarflexted 1st deflection

Creating a 2/3 or ¾ length cut away

1st metatarsal Phalengeal joint

Step 1
Place the device on the base of the foot and draw an arc around the 1st metatarsal Phalengeal joint sits.

Step 2
Ensure that the 1st MTPJ is free to plantarflex and grind or linish the orthotic so that the contour is comfortable for the patient by using a hand grinder or bench grinder.

ICB Orthotic Grinder

Some time the amount of support provided by the orthotic under the lesser metatarsals is insufficient and the patient will continue to feel pain under the 1st MTPJ. In this case more support may need to be affixed to the transverse arch of the orthotic to support the lesser metatarsals.

To increase support in the transverse arch, measure the difference between the axis of the lesser metatarsals and the 1st MTPJ, then add a forefoot addition wedge to the orthotic to support the lesser metatarsals. The forefoot addition should be positioned with the thickest side to-wards the distal edge of the orthotic.

ICB Orthotic Addition

To assess the amount of additional support required when the 1st MTPJ is mobile, if for example the measurement is 8mm in plantarflexion and 2mm dorsiflexion to the lesser metatarsals, subtract the 2mm from the 8mm, thus providing the required amount of support – in this case 6mm or 6°.

plantarflexion

This type of orthotic adjustment is called a ‘2-5 Metatarsal Bar’, which can effectively decrease pressure on the metatarsal heads by supporting the metatarsal shafts.

When modifying a Full Length orthotic product to create a 1st ray trench follow the steps below:

Step 1
Mark out the width of the trench by placing the foot of the orthotic and scribing a line between the Hallux and the 2nd Phalange.

Using Orthotics

posterior position of the 1st MTPJ

Step 2
Mark the line on an angle to allow the posterior position of the 1st MTPJ to be unimpeded by the orthotic arch.


Working with ICB Orthotics

Step 3
Place the device on a firm surface when grinding with a Dremel Hand grinder and remove the eva material leaving 1mm on the plantar surface and remove excess material behind the 1st MTP Joint.


View ICB Products

SAVE 10% OFF ICB PRODUCTS WITH DISCOUNT CODE: 02ICB10 Offer online only!

Choosing the correct size orthotic

ICB Superior Biomechanics

Choosing the correct size orthotics for the patient can be somewhat of a minefield if practitioners do not follow the correct procedure.

SAVE 10% OFF ICB PRODUCTS WITH DISCOUNT CODE: 02ICB10 Offer online only!

View ICB Products

Orthotics in which the Distal edge of the orthotic (2/3 or 3/4 style) is too long can cause issues for the patient such as, Sesamoiditis.

Orthotics for Foot

Sesamoiditis condition can occur when the 2/3 orthotic distal edge protrudes past the ‘break point’ of the foot and impinges the sesamoid apparatus.

Orthotics that are too short can encourage the patient to excessively pronate due to the devices inability to maintain the longitudinal arch position. A further issue is excessive internal tibial rotation.

Therefore the simple act of prescribing the correct pre-made orthotic size can be either extremely beneficial or somewhat of an issue for the patient.

Usually the orthotic size is determined by the shoe size, however, often patients present with shoes that are 1 or 2 sizes larger than they really need based on reasons best known to the patient. In this instance the arch contour can be longer than the patient requires and the orthotic arch can impinge upon the patients 1st MTPJ causing irritation of the sesamoid apparatus.

If the product being used is able to be heat moulded well into the patients arch and attention given to the area beneath the 1st MTPJ to ensure that the arch does not impinge, then, a larger size to fit the shoe can be acceptable although this situation is not ideal. There are three ways to determine the correct size is:

1) use the patients shoe size

2) use the shoe sizing guide and

3) physical measurement of the device on the patient.

The issue with shoe sizing is that it appears that there is no standard shoe size guide worldwide and a size 8w may be a 7.5w or a 8.5 -9 w in another shoe brand and therefore physical measurement become the only reliable way to determine the correct size orthotic.

*Brooks * asics *New Balance

*Addidas *Nike *Misuna

*Saucony *Spenco All different sizing

The Distal edge

Placing the product on the base of the foot and observing the position of the orthotic distal edge will deter-mine the correct size. The Distal edge should be 5-10 mm proximal to the 1st MTPJ or ‘break point’ of the foot.

Full Length sizing fold back orthotic to identify the distal arch. position.

Note the position of the 1st MTPJ on the full Length product in the photo.

The joint should sit approx. 5-1 mm proximal to the joint to allow the foot to break at toe off stage of the gait cycle. Impingement of the joint is not recommended.

Foot Orthotic

Some orthotic manufacturers provide sizing template guides (such as ICB below) however this is not a common practice.

ICB Foot Size Chart

(Above : ICB sizing template)

Measurement on the foot is therefore considered as the most reliable way to measure the device for the patient.

Physical measuring is important when patients present with short arch or long arch , long and short toes.

Short arch may need to either choose a smaller size orthotic or heat mould the orthotic really well into the arch and concentrate the heat around and under the 1st MTPJ to contour the product and remove any pressure from the orthotic arch on the 1st MTPJ.

Long arch may require a larger size orthotic and then the length will need to be trimmed to fit the shoe.

Wide feet can be problematic as the general orthotic designs in the marketplace do not cater for wide feet and practitioners may have to choose a product such as the ICB DRESS 2/3 Style design which has a lateral skive to allow for the foot to splay laterally.


Shorter wide feet can be adequately catered for with this product as the distal edge can be trimmed to reduce the length of the orthotic design

ICB Orthotics

(above ICB Dress style with lateral edge removed to allow for patients with wide feet.

View ICB Products